MKissa Creations

Life, Crafts and Kids in Vacation Land


Leave a comment

How did we get here?

Although I have been crafting for as long as I can remember, I have not always been a cross stitcher. I have been a quilter, a crocheter, and a crafter for years, but cross stitch is fairly new to me.

I started cross stitching when my oldest daughter was about 6 months old. You know, when they start needing more attention than just making sure they are loved, fed, rested, and changed. In those beginning days I could still quilt and sew to my hearts content (as long as I scheduled it during naptime). One day I found myself frustrated that my little sweetheart was not longer going to let me live my life the way that I had planned. Life was up to her now. I needed something to feed my crafty bug, that I could put down and pick back up easily. No extra set-up and cleanup. Not having to be worried about losing my spot or count while I finish a row of crochets while she screamed for something.

I found cross stitch. My friend Shannon posted on her Instagram a picture of a project she was working on, it was a Frosted Pumpkin pattern called Pumpkin Passport. “What an adorable thing to put in a little girl’s room” I thought as I immediately bought the pattern and the kit for it online. Time to teach myself a new craft/skill. I started working on it the second it got in my hands and I was right, this was a great craft to pick up and put down while my little one demanded my attention.

Then I fell down the flosstube rabbit hole. I was tempted by other gorgeous patterns and designers. I couldn’t just work on this one project!! My WIP (work-in-progress) list grew and grew. I changed my preference on fabrics to work on and Pumpkin Passport got pushed to the wayside.

After numerous starts and finishes I finally decided to get back to what brought me to this craft and get it finished! I completed it on December 9th last year.

Pumpkin Passport by the Frosted Pumpkin Stitchery


Leave a comment

Things I Know for Certain

March is Market Month in the Cross Stitch Community. Market is an event that takes place in Nashville, TN that brings designers and shop owners into the same event for everyone to co mingle. It is an opportunity for designers to show off finished pieces of their designs and a place for shop owners to stock up their shops. This upcoming and exciting event has really inspired me to get on top of my design game. I put some time into getting this project finished, just before it hit the one year mark and got right on top of designing some new pieces.

This is my first nod to Practical Magic, one of my most favorite movies and a quote that needs to be displayed on any witchy woman’s wall! It is called Things I Know for Certain and it is stitched on Picture this Plus 32 count linen in Shale and finished into a wall hanging. I’ve got another Practical Magic Stitch in the works and its in my q-snap and won’t be replaced until it is completed!

I am so excited to continue my designing journey as this pattern has given me so much inspiration to push forward! I will be branching out from the witchy vibes, but currently the only two patterns in my shop fit into that world. My YNYMO (You Know You’re Missing Out) Market (not actually gonna be there) Release will be my new Practical Magic piece, and from there, you’ll get two pieces that come from the surf world. Where we go from there is still living up in my brain somewhere and I have to dig it out!

The toughest part of designing for me is the idea. Once that exists, the design can get out of my head pretty quickly! Hopefully I’ll be back next week with a new pattern and maybe even a Flosstube video. I’ve gotta put it out there that I’m gonna start doing them again, to help motivate myself. It is time to get back into that habit!


Leave a comment

Preparing for Life on the Road

If you are interested in a abbreviated story of how decided to move across the country with a one-and-a-half and a three-year-old check out my last post.xcountry

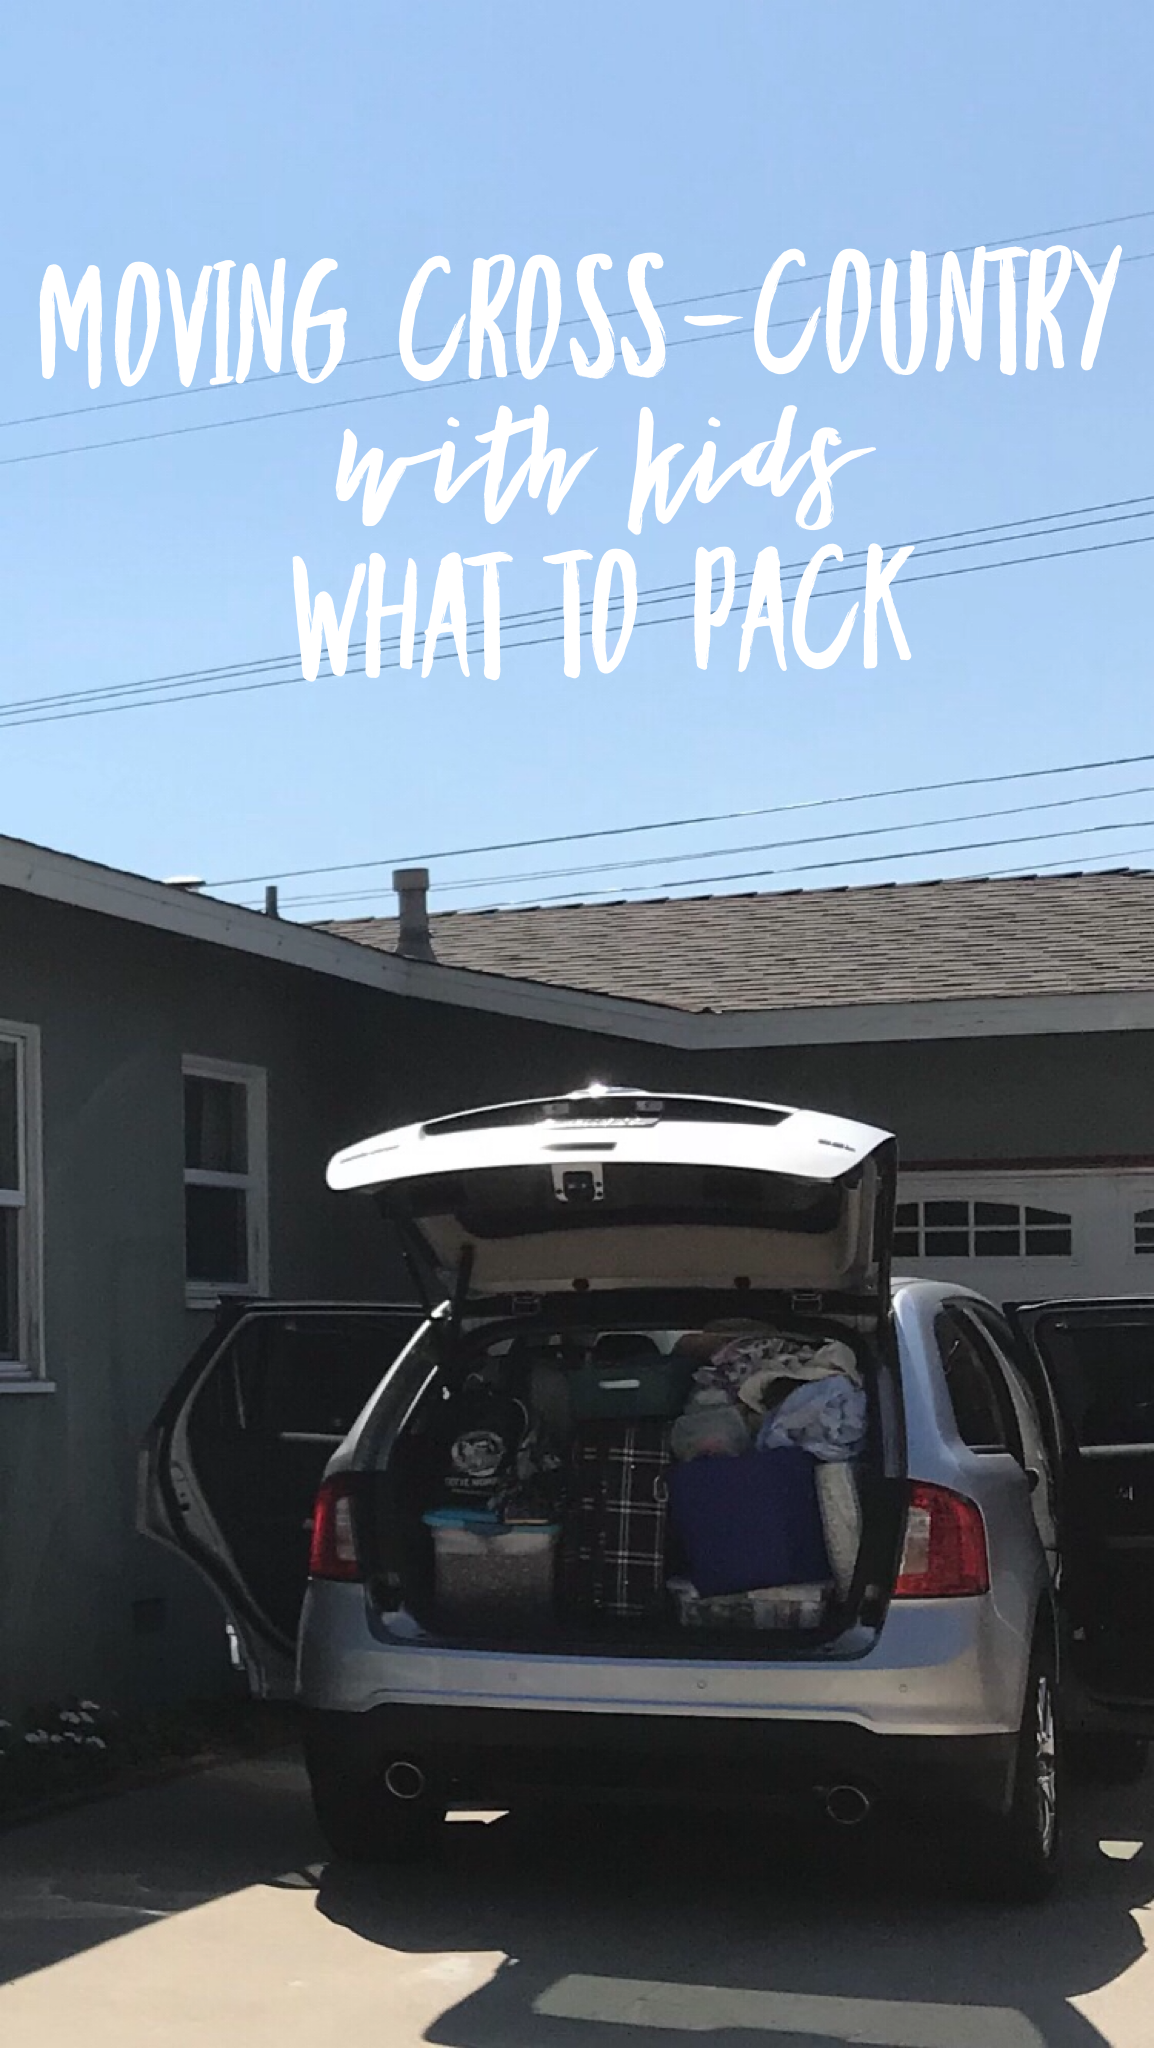
When we packed up our house in California we were packing our lives away for approximately six weeks. We would spend two weeks in Arizona on the lake, 17 days on the road, and about two weeks at our new rental with only the items we would have with us in the car. In addition to that, we were moving into a furnished rental for 6 months, so when we arrived we would set up a storage unit for most of our stuff to be delivered to and only some of our items would be delivered to the rental house. This meant a lot of careful planning in California trying to figure out what would come to the rental and what would go to the storage unit. My family has never been a family of movers and we had been living at our house for 13 years. 13 years worth of stuff is a lot to go through. This also meant looking at each item that we were packing and weighing out if we were willing to pay by the pound to move it across the country as well as if we were willing to pay by the square footage to store it for a month in California and approximately 6 months in Maine.

I would like to say that we peeled it down to the bare bones, but we still ended spending about $9,000 moving stuff and things across the country. All in all, we made some pretty good choices about it and there are only a few things that we brought that I would have left behind. Our coffee maker is the one that stands out the most as it was bulky and had been stored away for so long even before the move that it was rusty (it has already been delivered to our local Goodwill).

Evaluating what we would need for this trip (and when we arrived in Maine) was no small task, but the items that we packed fit into our 2014 Ford Edge. We did not travel with anything on the roof or tow a trailer behind us.

I bought a set of six 15-quart plastic bins and organized a lot of our supplies this way. Purchasing a matching set of plastic containers was great because they stacked perfectly with each other. They also conveniently fit right in between the two car seats.  The plastic bins held:

  1. E’s Toys
  2. Z’s Toys
  3. First Aid Items and Medicines – Any prescription Meds you need, Kids/Infants Tylenol, Dayquil, Nyquil, Imodium, Pepto Bismal, Tums, Instant Ice Pack, Bandaids, Tweezers, Gauze, Tape, and Neosporin (this is by no meals a comprehensive list of what should be in a first aid kit, but it worked for us). We also brought kids Dramamine because we had no idea if the girls would get carsick or not.
  4. Bath Items – Normal sizes of our regular brands of shampoo, conditioner and soap (I did not want to live on hotel soaps for a month), Burt’s Bee’s shampoo and body wash for the babes, a hair washing cup and a few small foam bath toys. If we did it again (which we won’t) I would have brought along our own suction cup bathmat (for the girl’s safety) as many hotels did not have them.
  5. Snacks – Our snacks of choice were applesauce pouches, organic baby food veggie squeezes, BelVita Breakfast Biscuits and Cliff Bars.
  6. I packed an empty bin. I packed this knowing that we would want to collect a few souvenirs along the way and I wanted to make sure that we had space for them. This also ensured that we didn’t buy anything too big.

The other items packed into our car included:

A Pack and Play with an extra mattress and extra sheets for Z, as she was only one and a half at the time, and she needed a place to sleep at our family’s house in Lake Havasu as well as at the house we were moving into in Maine. We got this mattress before our move and it worked out well and had its own carrying case.

A small firesafe– This contained all of our important documents. Social Security cards, Birth Certificates, Marriage Certificate, immunization records, and our passports. This was absolutely the most nerve-wracking thing to be carrying with us.

A small humidifier- Traveling with little ones it was needed and Michael got hit with a head cold part of the way through our trip and it was a lifesaver. We used this one.

An ice chest- this fit conveniently under E’s legs as both girls were in car seats. Our ice chest regularly contained Milk, string cheese, peanut butter, bread, an occasional soda, and anything else that might melt in the car.

3 suitcases – one large and two carry on size which held clothes for the four.

2 kids life jackets – we would be spending time on boats during our two weeks at the lake and would need them in Maine.

Diapers, Pull Ups and wipes – I got 2 Costco size boxes of each. I also made up a small basket that had the necessary changing items easily at hand (Diapers, Pull Ups, wipes, changing pad and diaper cream) and the rest of the packages were stuffed in whichever nooks and crannies we could find for them.

Book Bag- This contained our maps, atlas, and AAA travel books for all of the states we would be driving through.

Backpack & L.L.Bean Large Zippered Boat Bag- What was packed in these varied from day to day depending on where we were, but they usually contained, at the very least, diapers/Pull Ups for the day diaper wipes and hand sanitizing wipes.

A Box of Cross Stitch Patterns and Projects in Process- This was the only thing that we schlepped across the country that I feel like I should have just whittled down to one item and put the rest on the moving truck.

Almost all of these items came up to the hotel rooms with us every night. Michael became an expert at loading bell carts (Thanks, 6 years of hotel experience!) and I became an expert at packing the car back up each day (Thanks, Tetris!)

Up next… How and why we planned the actual route we wanted to take.


1 Comment

“Whatever you can do or dream you can, begin it. Boldness has genius, power, and magic in it.”

-Johann Wolfgang von Goethe PHILOSOPHER, SCIENTIST, AUTHOR

There is not another quote that can more accurately describe the last two years of our lives.

I can’t believe it has been almost a full year since we sold our home in Southern California and trekked across the country with our two girls to move to Coastal Maine. To help celebrate our first year here I have decided to start a small blog series about our move and our drive across the country. This entry might be considered “the boring post” it won’t been filled with hot tips, or tricks, but I figured some of you may want to know the story behind our move.

So, let’s start at the beginning. It was just an idea, the idea that, I, at some point in my life wanted to live on the East Coast. Before we were married, I had brought my husband, Michael, out to visit some of my family (that lives out here) for a couple of Thanksgivings and casually mentioned my idea. He liked it, but we were stuck in a house in Orange County due to the housing market fiasco of 2008, so it remained an idea.

Fast forward to 8 years, a wedding, and one daughter later… We planned to come out to the Boston area along with my sisters to bring our sweet girl to meet her Great Grandma. We decided to start checking out the coastal towns north of Boston that we might want to live in. We started looking for the perfect combination of affordable houses and great schools, we found it in Coastal Maine.

On our first trip we visited The Yorks and Portland. We fell in love with the state. We went back home to California with a renewed spirit and got to work on making our new dream come true. We wanted to have one more child while we still lived near both of our parents and were lucky that this time around it did not take us nearly as long to conceive and we welcomed our second little girl 21 months (to the day) after our first.

We took our new 3-month-old on a trip to the East Coast along with the rest of the family, to visit Maine again and attend my cousin’s wedding in Rhode Island. It was solidified, we were going to make it happen. We were going to move to Maine. We started thinking about dates, what made sense, what didn’t, what we wanted to see on our journey, and what it would be like traveling with two young kids for as long as the trip would take. The last of this list is where I found a severe lack of information from others who had done the same. Pinterest has lots of great lists for moving, and a lot of great lists for road trip activities for kids, but not all that much information on what it would be like to be without a home for a month.  So here I am, to share our experience with anyone who needs to, or wants to hear it.

Moving to another state without jobs was a scary thing to do, but almost necessary given our chosen industry. I was not sure that I wanted to stay at the management level, and line level service industry positions are not something you apply for while in another state, plus we did not have a specific timeline and did not want one either as we needed to sell our home to fund our journey.

Once we put our heads down and started working towards our goal, everything fell into place. We broke the news to a lot of our friends and family. Some understood, some did not. It was not easy to explain over and over again that Southern California was not a place that made sense for us to live anymore. It was a lot of work downsizing our belongings, saying goodbye to friends and family and getting our house on the market, but we did it. We sold our home and started our journey across the country.

Next up… How we planned our cross-country trip and what in the heck to bring with you when you won’t technically have a home for a month!


Leave a comment

What to Say When She’s Expecting

I seem to be going through another season of the women around me having children and after sending a couple of messages to my cousin I started thinking about how I always seem to pass the same things along to my pregnant friends and family. The advice I give to soon-to-be first time moms can seem a bit off to others. I’m not trying to come off as negative or scary, I’m not trying to freak them out, I’m trying to give them tools that no one ever gave me (I don’t blame this on anyone, I just want my friends and family to know what I experienced so they know I am there for them).

IMG_2556

Getting close with baby #1 (2015)

People seem to like to say “get your sleep now, you won’t sleep once the baby comes.” Please DO NOT tell this to a 9-months pregnant woman who has been sleeping sitting up for the past three months because her heartburn is so bad, or who has tossed and turned all night every night for the past two months because she is both incredibly freaked out and totally uncomfortable. Pregnant women might be the most gracious and polite creatures on this planet, and to tell you the truth, I’m not quite sure how we do it. Perhaps responding to these types of comments is the practice that we are getting to deal with tiny tyrant toddlers. We bite our tongues to keep the sassy comments at bay and smile at those who supply them. Sometimes it slips out that we aren’t really sleeping well at the moment either, but it is usually rather politely. Which is surprising given we are trying to deal with the fact that we just don’t want to be pregnant anymore but are simultaneously scared to death of both the actual delivery of our child and the aftermath that comes with it.

Do you want to be helpful? Tell that woman the truth!

Tell her about the time you cried because your husband came home after work and asked you what you did today. You know what I did when my sweet husband asked me that when he came home to me and our sweet two-month-old? I bawled and said “nothing.” I truly felt like I had not done a thing that day. In between feedings, changes, trying to get a little sleep during her naps, and realizing that if I tried to do anything that took more than five minutes she would wake/need food/need a change while I was trying to get said thing accomplished. So rather than get frustrated that I was unable to complete tasks I wouldn’t start them. I would take a quick scroll through my phone, or put on a movie I had seen a million times before and zone out. My sweet sweet husband hugged me, kissed my forehead, wiped my tears and reminded me that I had kept our daughter alive and healthy ALL DAY and that she could not have done that on her own. (Of course, all of your days can’t be like that, life must go on, but some days, its okay if that is all that happens AND this was with my first, adjusting to new mom life is tough, and yes, when the second one comes around, you don’t get to just care for your child all day, your attention is demanded elsewhere).

Tell her about your struggles with nursing, about how you had to visit a lactation consultant. How it hurt so bad every time at the beginning of nursing that you cried through the first minute on each side, and that the second the baby was done you dreaded the next session. Let her know, she is not alone, and that the next week she will be an expert and it won’t hurt anymore (and if it still does, something is wrong and call her doctor). Encourage her not to give up. Give her hope.

Tell her these things BEFORE she has the baby, while her brain is clear, while she can remember that you said them, so that she knows to reach out to you when she is feeling bad/scared/crappy. In our world of happy Instagram and facebook photos it is sometimes hard to admit when things aren’t perfect it can be hard to ask for help and its hard to see what is normal.

Perhaps I am jaded, maybe this isn’t helpful at all and I will come off as super negative, but, please think a bit before you give advice to a soon-to-be-mom or any mom for that matter. We try to let go of the fears and pain we’ve felt in our lives and are often successful in forgetting those moments. That is how we get through life in general, we focus on the good things, and when it comes to our parenting life, the amazing children we have brought into this world. Try to remember what it was like when you didn’t have a clue what you were getting into. What would you have liked to have known the most? What is the most helpful thing anyone told you going into this major life event.


Leave a comment

New Year – No Waste

D8Sa5iNdR6+DRcMwh%JBww  I’m introducing some new products to my craft fair show line this season that center around a less wasteful lifestyle. We recently made a cross country move and the amount of decluttering and trashing that we did before we left is something that I am actually ashamed of.

We have always been someone eco minded and have cloth diapered both of our children, tried to you cloth napkins, and recycled what we could. On moving day our house was still filled with so much stuff that we didn’t need, and when it came down to deciding whether or not to move it across the country, turns out we didn’t really want it either.

The experienced changed us. We had a new outlook. We had to stop buying things we throw out!

We have moved into a small beach cottage and are trying to scrimp and save everywhere we can so that we can buy a place here in the next year or so. First step… no more single use paper/plastic products in the kitchen. This means saying goodbye to paper towels, saran wrap, and plastic bags. No waste/Reusable and easily accessible towels has been the first venture. They are in the same place the paper towels used to be which makes the transition a little easier. I’ve started with one side soft flannel and one side terry cloth, which makes them great to use as napkins as well as they are soft on your face and hands.

Once the craft shows are finished for the holiday season, these should be up in my etsy shop, but for now, here is a preview of them and  a little insight on to why this is my current sewing project.

HfM1FQdJRbm+07kmhz5YQg              LfAB2VY0QXSRV8fwgpr1pg              HYITzcOKQnGfcZKnjIHMHQ


Leave a comment

Car Seat Canopy Tutorial

I was searching the internet for projects at two days passed my due date to keep the “UGH when will my baby be here?!?” feelings at bay and I decided that I should make a car seat/carrier canopy. After scouring Pinterest I found a few tutorials that produced a product that I liked the look of but all of them required 2 yards of fabric PLUS two additional strips or fat quarters of fabric. One of my main objectives lately has been to use up my fabric stash and I had the perfect fabric for this project… with one problem. I only had a yard of each of the fabrics and they are both (I think) loooong out of print, so there was no going to the fabric store or quilt shop to find some more. Yes, of course, I could have just picked up some coordinating fabric, but I decided I would figure out how to use just what I had and create a tutorial for others in the process. So here we go… please feel free to contact me with any questions about this, it is my first tutorial and I have baby brain, so while I’ll try to cover everything, I can’t make any promises.

Screen Shot 2015-08-17 at 8.20.36 PM

What you need:

2 yards of Fabric

5 inches of sew-on velcro

Coordinating thread (you can use white, but since you are top stitching, some color will add a little pop)

Press your fabrics well (pressing is very important in this project as you really want everything to lay flat and line up). Then, cut off your selvedges. I actually left about an eighth of an inch on each one since I knew that I would be using quarter inch seams (it gave me a tiny bit extra amount of length). Then cut off a 2.5″ strip of each fabric (this will be for your straps) and set them aside for later.

 IMG_2632IMG_2633

Line up your two fabrics right sides together and make sure your edges line up, trim up where needed to make things even. To round out the corners use a ceramic plate (don’t use the nicest one in the house) and you can use your rotary cutter right along the edge. If you don’t have a rotary cutter or do not want to use your cutter against the edge of your plate you can use the plate as you would a template and trace where you will make your cuts. Round out all four corners and recheck your fabric alignment to make sure everything is matching up.

IMG_2634

At this point you can pin your fabrics together to make sure they stay lined up, but I despise pinning, so I just repressed with a bit of steam and it seemed to hold my fabrics together enough for me to not need to pin, then its time to start sewing using a quarter inch seam. I used a pin to mark off where I should stop to make sure that I left a gap to pull the fabrics right side out. Once you make your way around take the fabric off the machine pull your fabric through. Push all of your corners and edges out well and press again. Press all of your edges out and fold your seam allowance (at the gap you left) under. Then it is time to top stitch. Start your top stitch just before your opening so that you can make sure it is sewn up with no issues.

IMG_2636 IMG_2637

After you top stitch the main pieces together that part of your project is done. Take your 2 (2.5″ x 1 yard) fabric strips and cut them each into (3) 2.5″x10.5″ inch pieces (discard the small leftover pieces). Set your strips up and sew them into tubes. Your straps won’t be the same, but they will coordinate with your two fabrics… and hey this is about getting the most out of those one yard cuts!

IMG_2638 IMG_2639

Once your have your tubes sewn together press all of your seams open. Once seams are open press your straps like below.

IMG_2640 IMG_2641

Sew one end of each tub shut completely and one end sew just half. Turn the two tubes right side out, press and topstitch.

IMG_2642 IMG_2643

Cut your velcro in half so that you have (2) 2.5″ strips. Sew a coordinating piece on each side of your strap pieces.

IMG_2644 IMG_2645

Measure your main fabric to where you will add your straps to. I measured 20 inches up and 10 inches in for mine. When sewing the straps on I measured 3 inches up from the bottom of the strap and then sewed a 2.5″ square with an “X” in the middle for a bit more stability. You can see it in the picture below on the right. These measurements leave about 10 inches in between the two straps as well which gives a bit more room in between the two straps so that you can slip your whole arm in your carrier instead of just being able to hold it with your hand.

IMG_2646 IMG_2647

I’d love to see any projects that come from this tutorial. Feel free to comment with pictures or post on instagram and hashtag #mkissacreations. Again, please let me know if you have any questions or if a step in the process seems unclear.

IMG_2649


Leave a comment

Pillows are back in stock!!

Being on maternity leave has been great, I put my etsy shop in vacation mode and kicked my butt into gear preparing for our new baby’s arrival. I was pretty dang sure I was going to have this baby early so I stressed myself into super nesting mode and got everything for baby done… and then… the waiting started. We still aren’t at my official due date yet, but with the house all ready to go I started getting bored.

So I made a deal with myself. I could list things in my shop that were ready to ship and no custom orders. That, my friends, is how I have spent the last 3 days at my sewing machine (in between walks to try to get baby to drop and bouncing on my birthing ball) and was able to pull my shop our of vacation mode even though we are expecting a baby in the next week or two.

Since colleges all over the US are about to start up I figured I would focus on my sorority themed pillows. I currently have pillows that represent 4 of the many houses in the greek system. The next two days I plan on designing at least two more so that I can represent some more of the Greek System.

Sorority Pillows

These pillows make fantastic gifts for your Little Sis or for your daughter away at college who has successfully gone through recruitment and her pledge period! Houses represented here are Alpha Phi, Delta Gamma (DG), Phi Sigma Sigma (Phi Sig), and Kappa Alpha Theta (Theta). Coming soon Gamma Phi Beta (Gamma Phi)!


2 Comments

I’m So Crafty I Make People…

We have a baby on the way!! Research and baby mania has filled my brain and my crafting has been limited to filling etsy shop orders and working on our little one’s quilt. We haven’t found out what we will be having (just hoping for a healthy baby at this point) so I chose semi neutral colors. We have stuck with aqua and lime for our main colors with yellow and grey thrown in as well. I am happy to announce that I finished the quilt and have it washed and ready before baby has made an appearance!! WOOO!

The pattern that I used is called Mommy & Me. I purchased it at my local quilt store where I also attend classes, but I am sure that you can find it many other places both online or at a local shop near you. I considered a minky backing but I really loved the animal word fabric that I used on the front in place of the large Ric Rac and I wanted to be able to feature it a bit more, so I pieced a backing as well.

IMG_2505      IMG_2506

I could not be happier with the way that it turned out. I can’t wait to take pictures of our little one playing on it and snuggling with it! I should be around a little bit more. My leave starts soon and I plan on sewing up a storm before baby arrives!


Leave a comment

Quick DIY Furniture Makeover

Yesterday I had a few hours to spare and a piece of furniture that no longer fit in our newly remodeled bedroom. This nightstand has been in our house for around 6 years or maybe more, belonged to two different people in this house and lived in 3 different rooms. I love the functionality of it (its a great place for my bedside books and with two drawers it helps keep down the appearance of clutter). I really wanted to keep it in our room even though it didn’t match. Sooo… time for a makeover. The only thing I purchased was a can of spray paint to work as a base coat. I removed the hardware and got to work spraying. Trying to get coverage with spray paint in a semi breezy backyard was tough, but it worked. After the spray paint dried I used leftover trim paint to get it looking the way I wanted, let it dry, put the hardware back on… and BAM! Brand new end table that looks nice in our bedroom.

10689533_10100365394513619_7029601202906459473_n