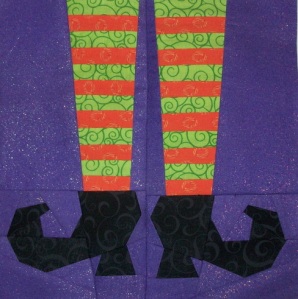
Halloween is one of my most favorite holidays! I love dressing up and making costumes.Last year we had the opportunity to dress up when it wasn’t Halloween. One of our friends had an ABC (Anything But Clothes) Party and I had a lot of playing cards around…

Most of my costume crafting is done very very last minute and without a lot of planning, and yes, that has come back to bite me in the ass once or twice. Although I don’t have pictures of the construction I can pretty much tell you how I made these. I cut out all of my pieces from muslin and ironed on a fusible interfacing. Then I laid out all of the cards in the order that I wanted them and ironed them on. I did this one column at a time and I did it before I sewed any pieces of fabric together. After all of the cards were ironed on to the fabric I sewed diagonal lines in both directions across each card. This kept any corners from peeling and also allowed us to sit in our costumes without worrying about cards falling off.
My outfit consists of an under-bust corset with metal rivet holes in the back and then I made a three piece wrap skirt (three trapezoids). I couldn’t quite find a way to cover my whole top with cards without making a potato sack looking dress, so the t-shirt with strategically placed straight flushes had to do. They were hot glued together and then glued onto safety pins and then affixed to my shirt. We each had a pocket on our clothes made out of an empty card box. Mine was on my skirt and the MANs was on his vest.
I made the pattern from my husbands shorts based on a pair of board shorts. If I did it all over again I might take a little bit more time on the crotch area as it seemed to bunch weird, but he wore it like a champ and won best costume amongst all of the men there. I made his vest and short pieces the same way that I made the fabric for my skirt and corset.
I really loved the way these turned out, and both costumes are sitting around waiting to be revisited.
Sam Adams and Sain t Pauli’s Girl – Our forever Bar Hopping Halloween Costumes. I made this set for my husband. I used Butterick Pattern 3072 I used Gabardine that I found at our local discount fabric store for about $3/yard and found the buttons for his vest there as well. I lined the vest with muslin (again, last minute, not enough planning, I wish I would have lined it with darker fabric). I have purchased the wool to make the coat that is shown in the pattern too and oh he is just waiting for me to pick up that fabric again.
I was lucky enough to be gifted a German Dirndl (which I had a friend quickly hem about 18″ off of the minute it was in my possession). I did make the shirt to wear underneath it from a very simple pattern and white eyelet fabric.
I’m not quite sure yet what we will be wearing this year, but its getting close and I’m sure I will end up in freak out mode sometime soon here!
What are you going to be for Halloween?


 Most of my costume crafting is done very very last minute and without a lot of planning, and yes, that has come back to bite me in the ass once or twice. Although I don’t have pictures of the construction I can pretty much tell you how I made these. I cut out all of my pieces from muslin and ironed on a fusible interfacing. Then I laid out all of the cards in the order that I wanted them and ironed them on. I did this one column at a time and I did it before I sewed any pieces of fabric together. After all of the cards were ironed on to the fabric I sewed diagonal lines in both directions across each card. This kept any corners from peeling and also allowed us to sit in our costumes without worrying about cards falling off.
 t Pauli’s Girl – Our forever Bar Hopping Halloween Costumes. I made this set for my husband. I used


